A Year in Photos

Photography, fiction, and personal essays form my three primary creative outlets. For this blog's first 18 months, I used it primarily for photography. As I've returned to creative writing, I'll use this blog for fiction, too. Sometimes, when reality needs to be discussed more than truth, I write personal essays.

This blog will continue to showcase as many above-average photos as I can muster. Hopefully my written work will be as good or better than the visual. Whichever drew you here -- photographs or fiction, I hope you enjoy both.

Monday, December 31, 2012

2012 Top 20 -- Photo 1

I took this back in April. Any photo I took after it this year would have had a hard time beating it for the #1 spot. Heck -- Pentax featured this photo on their Facebook stream in a blurb about me. This is one of those images that just works well, and I'm pretty proud of the final result, too.

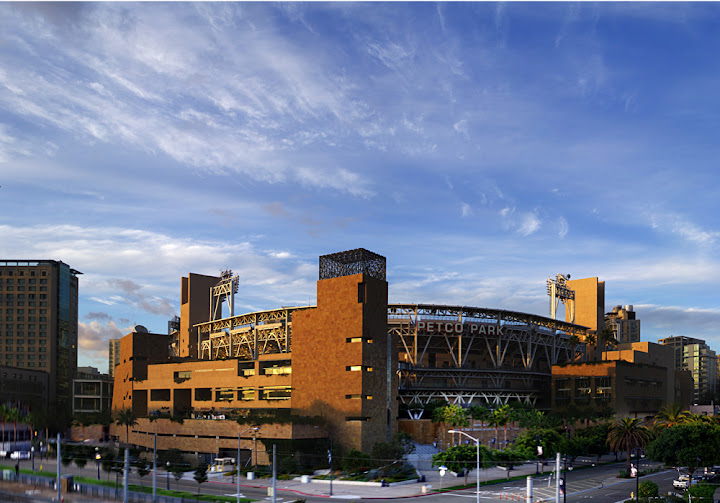
And, a final fun fact: This image was taken during the same shoot (though two days later than) image 16.


Next year I'll continue this blog, for the three people who read it regularly, and for myself. Last year I set a pretty ambitious goal -- a different roll of film, camera, and lens combination every day. I managed that for much of the year, but since taking a job in the suburbs let it fall off. So next year this blog will be slightly different. I'm not sure exactly how yet. I plan to mix the subjects a bit more -- photography, how-to, technical information, and so forth. With luck, I can figure out how to embed YouTube videos and have them be centered. One thing I hope to do is more integrate this blog with my YouTube channel.

Anyway, have a safe and happy new year and stick around in 2013 for more, exciting, and bigger  blog posts.

And now for some 2012 metrics:

2012 blog views (through December 30): 4,305
Most-used camera: Pentax K-7 (64 times)
Most-used FILM camera: Nikon F3 (14 times)
Most-used lens: Sigma 35-80 (42 times)
Most-used film: Foma 400 ISO (20 times)
Most-frequented location: SOMA -- San Francisco's South of Market Neighborhood (33 times)
Most-viewed entry (2012 only): An Old Camera Photographs Old Piers (50 views)


Sunday, December 30, 2012

Saturday, December 29, 2012

2012 Top 20 -- Photo 3


Friday, December 28, 2012

2012 Top 20 -- Photo 4

Fun fact: This photo was taken just about two minutes after I took image 18. Off to the right, that's the Pacific Ocean at Ocean Beach in San Francisco.

Thursday, December 27, 2012

2012 Top 20 -- Photo 5

A 1:1 macro using a Vivitar 135mm (f 2.5) M42 lens and an Asahi Macro Bellows II. Early next year I'll do a post on how to calculate macro ratios. I'll show you both the hard way (that involves lots of maths) and the easy way (that doesn't.)

Wednesday, December 26, 2012

2012 Top 20 -- Photo 6

Perhaps not the most technically perfect shot I took all year -- the focus was on the reflected mannequin. I like how jealous the reflected mannequin looks of the foreground mannequin, as though he wants to walk over there and punch that rather unsuspecting-looking fellow.

Tuesday, December 25, 2012

2012 Top 20 -- Photo 7

Fun fact: This was taken on the same day, with the same roll of film, and in the same camera as image 14.

Monday, December 24, 2012

2012 Top 20 -- Photo 8

This is my desktop wallpaper. This is one single frame, not an image composite. It includes an F-22 Raptor, P-51 Mustang, and FA-18 Hornet. That may be a Super Hornet, actually. I'm not sure.

Fun fact: This photo was taken on the same day and with the same camera and lens as image 11.

Sunday, December 23, 2012

2012 Top 20 -- Photo 9

Robert Emmett, I believe. This sculpture silhouette was taken outside the California Academy of Sciences and DeYoung Museum. 

Saturday, December 22, 2012

2012 Top 20 -- Photo 10

So, look, you may not actually be reading this right now. Yesterday was the 21st, so today may be the first day of Armageddon. I'm writing this on December 7th, so who knows what's going to happen in two weeks. In the unlikely chance that not all of humanity was destroyed by the Mayan calendar ending yesterday, here is the first of our top 10 photos from this year's top 20!

Friday, December 21, 2012

2012 Top 20 -- Photo 11

Fun with Photoshop! This is not a whole bunch of planes making a choreographed loop; instead, this is one plane from multiple photos that I arranged in a loop. The bottom two planes I had to slightly change the direction of to achieve this overall composition. One of the reasons this works is that because all of the shots were taken from the same vantage within about 20 minutes, the lighting is from the same angle on each plane, so it looks like to could be real.

Thursday, December 20, 2012

2012 Top 20 -- Photo 12

Sunset over Walnut Creek, from Mount Diablo. From a technical perspective, this may have been my best photo of the year. Sunset images like these are notoriously difficult to capture and meter well. Mostly, though, I just lucked out. Thank goodness for bracketing!

Wednesday, December 19, 2012

2012 Top 20 -- Photo 13

The SF Public Library. I'm not a huge fan of gently upward architectural shots -- in fact, typically, I hate them. However, I liked this how because the upwardness is largely cancelled by the various angles within the image.

Tuesday, December 18, 2012

Saturday, December 15, 2012

2012 Top 20 -- Photo 17

One of my personal favorites from this past year, I enjoy how this photo's subject and her shadow work together in the composition.

Friday, December 14, 2012

2012 Top 20 -- Photo 18

This was a fun photo experiment. To capture this I took a series of images in rapid succession with my K-7. Then I used Adobe Photoshop CS4 Extended to stack, align, and blend the images into one composite. Want to see how I did it? That's right -- there's a video at the bottom of this blog post.


Thursday, December 13, 2012

2012 Top 20 -- Photo 19

A red tail hawk and a dead tree. No shade, just sky, dry grass, and heat. This was a fairly lucky shot, the hawk being in the ideal place for a rule-of-thirds composition. In fact, I used this image to create a three-minute how to about the rule of thirds. That video is below this image and also available on YouTube.


Wednesday, December 12, 2012

2012 Top 20 -- Photo 20

I really don't like Andy Warhol's art. Let me get that out up front. But, I wanted to experiment with modern art. So I took a photo specifically to try converting it into artwork. This was the result -- my 20th-best image for 2012. If you'd like to see a video explaining how I made this image, check out the video at the bottom of the page.


Tuesday, December 11, 2012

A Year in Photos -- Annual Wrap-up (7 of 7)

This photo should -- should -- have made the top 20. However, the lower left corner (this is hard to see at this resolution) from the driveway with the car vertically down the dark grass to the images bottom and all the way left exhibits what's called the 'jelly' effect. This is an example of digital cameras thinking and their thinking causing problems. The car is itself in perfect focus. My K-7 saw that car moving and decided that was what I wanted in focus, not the rest of the image. So it moved the sensor to track the car and the rest of the image looks a bit like jelly.

Otherwise, I'm pretty happy with this image. The sky exhibits some vertical gradation darkening indicative of too few sky images being taken. Vertical darker gradient lines in images stitched together from multiple shots indicate insufficient overlap between images. This manifests as dark lines because of color drop-off at the edge of images. All lenses vignette to some extent. In stitching an image together, great care should be exercised to avoid these darkened areas.


Monday, December 10, 2012

A Year in Photos -- Annual Wrap-up (6 of 7)

So far the previous five photos were pretty much random selections. These last two were almost in the top 20. This one I like as a marketing photo, but not as a creative photo. A dramatic sky, ample open space for copy, and nice clarity make this a reasonable image for a brochure. The same is true of tomorrow's photo, too. This didn't make the top 20 because in the lower right the horizon distorts and sweeps upward. But, most people aren't likely to notice that, especially if there's some text in the sky.

Sunday, December 9, 2012

A Year in Photos -- Annual Wrap-up (5 of 7)

I admit this is a photo I like. It's not framed perfectly, with a partial backhoe in the background and a partial connex box on the right. Also, there's a glaring technical flaw in the middle where part of the building behind the backhoe's arms is blurry. But, it's dramatic and uses tones decently.

As some of my early November posts discuss, photo stitching is no easy business and one mistake in one photo can ruin all the time and effort spent merging multiple photos into one image. In this case, it was the blurry building in one image that really ruins this whole photo. It's still good, but not great for that reason.

Saturday, December 8, 2012

A Year in Photos -- Annual Wrap-up (4 of 7)

I got this photo on an aluminum print and it's hanging on my office wall. I dig it. A Blue Angels FA-18 Hornet banking with sonic condensate building up on the top. This is the type of photo telephoto lenses were created for. This and bird photography. 

Friday, December 7, 2012

A Year in Photos -- Annual Wrap-up (3 of 7)

Typically, I avoid high-ISO photos like I avoid the bad parts of town. I don't like digital noise. It lacks the character and aesthetic appeal that high-ISO film yields. Yet this image, taken at ISO 1,600, had a pleasing result with rich colors and a softness that suits the subject.

And one of the things I learned this year is that high-ISO digital photos can be aesthetically pleasing given the right subject. To understand this, we should understand a bit about how digital ISO works. A digital sensor can ONLY see light in one way -- the manner in which its physical and software parameters dictate. So with high-ISO images captured on a digital camera, the photographer is basically hyper-underexposing the image.

So, using complex algorithms I won't pretend to understand, the camera's computer uses what little light was captured by the digital sensor and extrapolates what the image might have looked like. And it gets this correct, but with substantial loss of sharpness and acutance. Now, for some subjects such as this mirror hallway with painted amorphous shapes or some portraits, this can yield a nice effect. For most uses, though, using high ISO settings should be an option of last resort.

Thursday, December 6, 2012

A Year in Photos -- Annual Wrap-up (2 of 7)

Coffee. Back when I was a kid, every year in grade-school chorus we had to sing this song. "C-o-f-f-e-e, coffee, that's the drink for me." And it went on from there, though I don't recall the rest. Coffee. Either this photo says that coffee is love, or that coffee is a radish. I'm not sure which.

Wednesday, December 5, 2012

A Year in Photos -- Annual Wrap-up (1 of 7)

Well, this was a mixed year. I managed to maintain the daily roll of film goal for about seven or eight months (ending at the same time as my taking a job in the suburbs, where there is less interesting stuff to photograph.) But I did manage to take a good number of photos with which I am happy or very happy. Since I'm in a cast and immobile until sometime in January, I'll use this month to summarize this past year, meaning all the best photos are coming every day from now until the end of the month.

Starting on the 12th, I'll begin a countdown of my 20 best photos from 2012. Next year, we'll pick back up again in late January, once I'm back on my feet. Until the 12th, I'll share a mix of good photos and some of the YouTube videos I've made throughout the year.


Blackbeard here is from Fisherman's Wharf, San Francisco. He's outside one of the shops along the wharf, and the link in the previous sentence takes you to that exact shop on Google Maps.

Black and white photography captures many subjects well -- those with texture, contrast, and that certain quality which transcends description benefit greatly from black and white. Certain subject simply lend themselves better to rendition in silver. Black and white film, and black and white in digital, still sees color, though. And using light and color to your benefit when shooting in black and white can help enhance, moodify, or ruin an image. Here's a video I did earlier this year on using colored filters to enhance black and white imagery. This video explains -- and shows -- how colored filters change the way a medium sees tones as colored filters manipulate light wavelengths that reach the photographic medium.

Monday, December 3, 2012

Back Shortly

So the blog has been away for a month. Mostly due to personal constraints, now due to me being in a cast until well into January. Later this week, though, I'll be back and begin a series to wrap-up this blog for the year.

Thursday, November 1, 2012

Single Image, Lots of Scale

Lest you think I'm simply a photo-stitch fauxtographer, I wanted to share an architectural photo I took that is a single shot. I set myself up for this shot by selecting my place and waiting for people. This took very little time.

Without the people, this bridge has neither scale no depth. This shot shows that the spire is a good distance away and the person near the spire shows it has significant height, too.

Wednesday, October 31, 2012

The Agony of an Almost-usable Shot

This is a heart-breaking shot. I took this from a pedestrian bridge by Petco Park and this is a 98% perfect shot. Check out the lower-left corner.


Yeah, you see it now and you can't un-see it and the photos probably ruined for you, too. That's a blurry corner because someone happened to be running past me as I took a photo, and I didn't realize it.That corner and the two images around it were unforgivably motion-blurred. It was as though The Thing were running behind me. I cropped out as much as I could, but as you can see, three bad photos ruined a collage made from twenty-five otherwise fine images.

Had I been using a tripod -- same result. This was avoidable only had I been paying attention to my surroundings and noticed that the bridge was shaking too much.

Tuesday, October 30, 2012

Another Way to Mess up a Photo Stitch

Yesterday we looked at just one of myriad ways to screw up an otherwise fine shot. In this, the images suffer from SUBSTANTIAL barrel distortion and the stitching even has some issues.


Know what frustrates me most about this image? I nailed the sky. I love building photos with dramatic skies. And this was exposed darn-near perfectly and adds a very unnecessary flair to this shot. But the image was ruined by the way the building rendered. I count no fewer than four major issues in this photo.

1- On the left, the palms are all blurry. The exposure was too long and I was hand-holding it. Ever heard the axiom garbage in, garbage out? Well, that's incredibly true for stitched photos. Put together thirty bad photos, or even twenty-nine good photos and one bad photo, and you will invariably have a bad photo stitch. That blurryness (and issue we will see again tomorrow) is inexcusable.

2- Next to the blurry image is a random dark spot. That's not due to an overhead cloud, but because one of the images exposed for the sky, not the building, and the photo software had to include it because I only took one shot of that spot. I could have prevented that by doing what I described yesterday: taking a complete set of the building metered for the building, then taking a complete set of the sky metered for the sky.

3- The building looks like it's rounded. This has to do with how the photo software elected to stitch the images. This could be corrected by simply forcing a different stitching method. However, that's not a truly worthwhile effort because of problems 1,2, and 4.

4- I fixed the issue, but on the right side the triangle shapes along the roof appeared to be forming out of a foggy miasma. The photo editing software elected to blend the building and sky. The result was far from pleasing and much closer to ill-making. So I cloned the other triangle forms a few times to rebuild the ones that were blended into the sky.

And, ultimately, why would I want to invest tons of time in fixing the above photo when I have the below one to use instead:


Different perspective. This was from a different angle on the building and lent itself well to the building not appearing to bulge. Also, while I did have to fix one of the roof-line triangles, this image is largely successful. I also had to remove some other photographer's tripod. He was nearer the first photo's location, so I imagine that his photo probably has some ugly bulging, too. Unless he was going the HDR route. Yuck. But he did use a Nikon, which is almost as good as Pentax. Just sayin'.

Anyway, this goes to the last point: if you have an assignment or are just photographing for fun, take multiple images. Don't take one snap and call it quits. Sure, you would from that get some good shots with enough time, but in terms of setting yourself up for success, it's best to take multiple similar shots.

Monday, October 29, 2012

How to Mess up a Photo Stitch

Taking a good photo is hard. Taking 30 good photos with the aim of making a single good image is substantially more difficult.


The problem with this image is immediately evident. About 1/3rd of the way from the right, the sky becomes a different shade and the clouds blurrier. That's due to the Hilton on the left. The Hilton is a large, white block reflecting a TON of sunlight, which altered the sky's color for the individual jpgs that included that structure. The sky on the right third comes from at least one image where the sky is the predominant aspect, so it represents what the color should actually be.

Unfortunately, that major problem ruined an otherwise fine, but boring, photo. How could I have avoided it? I should have metered the sky and then used the auto exposure lock button for a row of images of just the sky; then photographed the Hilton in a separate group; then photographed the triangles by the convention center in a third group. That would have metered each of the image's components properly and results in an image that was properly metered from side to side.

So, today's photo stitching tip: imagine the final image and then scan the scene for metering issues. Use your camera's exposure lock feature to photograph each major component at the same setting. The software will figure out the placement, in all probability. If not, some minor fixes can be done. We'll see those tomorrow.

Sunday, October 28, 2012

San Diego's Harbor Club East and West

Tied as the eighth-tallest buildings in San Diego, the Harbor Club East and West are both 424 feet tall and 41 stories.


The first thing to understand about this image is that it is not a single image. You're probably familiar with the practice of photo stitching -- panorama creation. This process combines multiple images to create a seamless, single finished image. 

This image began life as 36 14.6-megapixel images. If the images did not overlap in anyway, that would be a 525-megapixel finished product. Now, the images do and must overlap. Lenses have color drop-off and vignetting on the edges, so there's a limited, central range where each image can contribute to the overall composition without causing strange lighting problems in a photo. So this image's original is actually 7,447 by 6,633 pixels -- 49.4 megapixels. Yes, your math is correct -- less than 10% (on average) of each image is used in the final composition.

Why, though, this amount of waste? The most in-focus part of an image is the center. As the image progresses to the edge of the image circle (and frame), the image quality begins to blur and darken. So using only the central portions of the photos means that only the best parts of the images are retained -- only the most-in-focus areas used.

You'll notice this image seems exceedingly sharp and detailed. Part of that is because only the sharpest part of each image is used and part of that is because this 49-megapixel image was downsampled to a 0.8-megapixel image for this post. The actual pixel-by-pixel clarity is not any greater than in a typical image.

The Internet contains myriad guides to photo stitching. Suffice to say, you will need a camera and a software capable of creating stitched images. There are purpose-made programs for this use if you don't have Photoshop.

For the other posts this week, we'll look at some of the pitfalls to this technique and why they occur.

A Year in Photos -- Week Forty-five

Last week I was in San Diego for a couple of days attending a conference. On my first day, I had two hours to get out and take photos. I managed 76 that I wasn't unhappy with -- pretty good for two hours. So this week we're going to take a look at five photos, some good shots and some not. The purpose of this week's blog will be to show you some of my mistakes and discuss how to avoid them. Here are the photos we'll pick apart:


Thursday, October 25, 2012

First Infrared Film Experiements and a Bluefire Police Bonus

I've had two rolls of infrared film sitting in my fridge for about six months, waiting for an opportunity to use them. So I used them camping. I shot four copies of the same image -- ISO 400 with no IR filter, and then ISOs 6, 10, and 12 with an IR 720nm filter. The final images in the series are a Photoshop-generated composite of each image.

400

6

10

12

Combined

I find the combined image to be the best. Not only because the horizon is level, but also because the shadows have suitable darkness mixed with suitable detail and the overall infrared look gives it a desolated field suitable for the somewhat beat-up concrete.

For this shot I wanted to try a deep-field shot. In the 1930s, using PLATE cameras and infrared-sensitized emulsions, the U.S. Military was taking pictures with fields of view up to 330 miles (from airplanes.) Even today with great cameras, fields of clear view are not much more than 70 miles or so from an airplane (that's partly an estimate, partly a guess based on my own experience photographing the planet from airplanes.)

So, for reference, there's a tall bump on the left horizon line. That's Mount Tamilpas in Marin County, 35.36 miles as the crow flies from Juniper Campground.

400

6

10

12

Stacked images

Again I like the stacked image the most. Photoshop does a nice job of selecting each image's best qualities and ignoring the worst.

For my camera, I used my Pentax K1000. The lens was my Sigma Macro 50mm. Film: Rollei IR 820. This is a fabulous film and I strongly recommend trying it for fun, artistic expression, and experimentation.

As an added bonus, some images I took with Bluefire Police: a 64 ISO microfilm with a great amount of detail and pretty intense contrast. My scanners does NOT like this film, though, so there's a bit of scanner noise in the images.