A Year in Photos

Photography, fiction, and personal essays form my three primary creative outlets. For this blog's first 18 months, I used it primarily for photography. As I've returned to creative writing, I'll use this blog for fiction, too. Sometimes, when reality needs to be discussed more than truth, I write personal essays.

This blog will continue to showcase as many above-average photos as I can muster. Hopefully my written work will be as good or better than the visual. Whichever drew you here -- photographs or fiction, I hope you enjoy both.

Wednesday, October 31, 2012

The Agony of an Almost-usable Shot

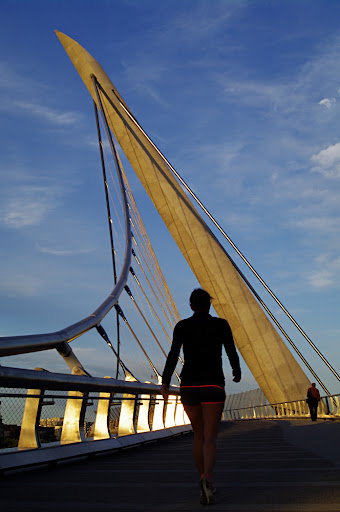
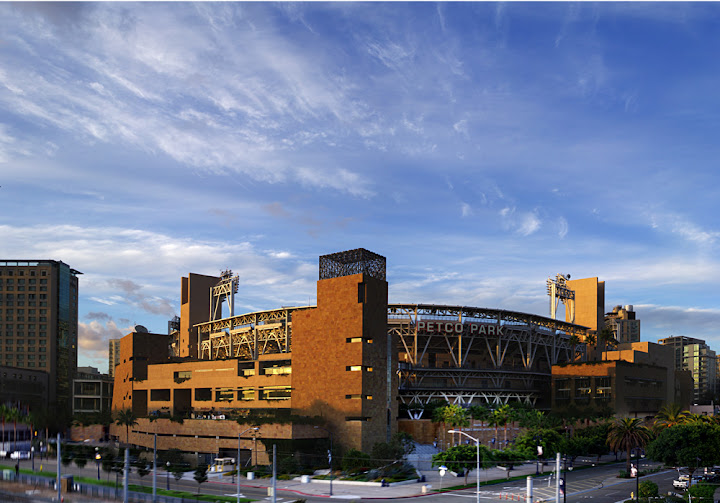
This is a heart-breaking shot. I took this from a pedestrian bridge by Petco Park and this is a 98% perfect shot. Check out the lower-left corner.


Yeah, you see it now and you can't un-see it and the photos probably ruined for you, too. That's a blurry corner because someone happened to be running past me as I took a photo, and I didn't realize it.That corner and the two images around it were unforgivably motion-blurred. It was as though The Thing were running behind me. I cropped out as much as I could, but as you can see, three bad photos ruined a collage made from twenty-five otherwise fine images.

Had I been using a tripod -- same result. This was avoidable only had I been paying attention to my surroundings and noticed that the bridge was shaking too much.

Tuesday, October 30, 2012

Another Way to Mess up a Photo Stitch

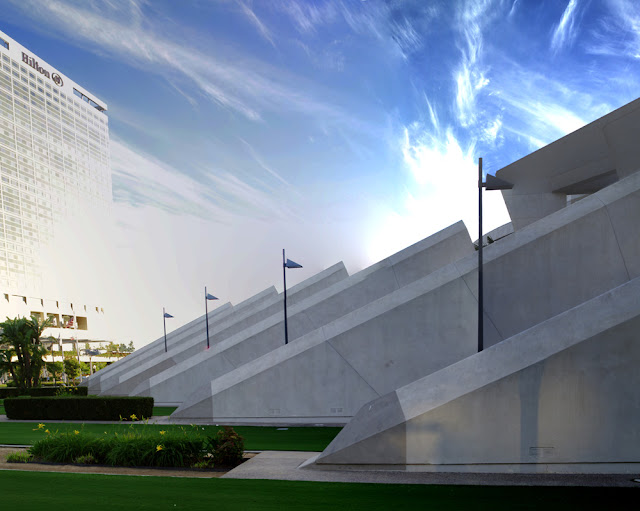
Yesterday we looked at just one of myriad ways to screw up an otherwise fine shot. In this, the images suffer from SUBSTANTIAL barrel distortion and the stitching even has some issues.


Know what frustrates me most about this image? I nailed the sky. I love building photos with dramatic skies. And this was exposed darn-near perfectly and adds a very unnecessary flair to this shot. But the image was ruined by the way the building rendered. I count no fewer than four major issues in this photo.

1- On the left, the palms are all blurry. The exposure was too long and I was hand-holding it. Ever heard the axiom garbage in, garbage out? Well, that's incredibly true for stitched photos. Put together thirty bad photos, or even twenty-nine good photos and one bad photo, and you will invariably have a bad photo stitch. That blurryness (and issue we will see again tomorrow) is inexcusable.

2- Next to the blurry image is a random dark spot. That's not due to an overhead cloud, but because one of the images exposed for the sky, not the building, and the photo software had to include it because I only took one shot of that spot. I could have prevented that by doing what I described yesterday: taking a complete set of the building metered for the building, then taking a complete set of the sky metered for the sky.

3- The building looks like it's rounded. This has to do with how the photo software elected to stitch the images. This could be corrected by simply forcing a different stitching method. However, that's not a truly worthwhile effort because of problems 1,2, and 4.

4- I fixed the issue, but on the right side the triangle shapes along the roof appeared to be forming out of a foggy miasma. The photo editing software elected to blend the building and sky. The result was far from pleasing and much closer to ill-making. So I cloned the other triangle forms a few times to rebuild the ones that were blended into the sky.

And, ultimately, why would I want to invest tons of time in fixing the above photo when I have the below one to use instead:


Different perspective. This was from a different angle on the building and lent itself well to the building not appearing to bulge. Also, while I did have to fix one of the roof-line triangles, this image is largely successful. I also had to remove some other photographer's tripod. He was nearer the first photo's location, so I imagine that his photo probably has some ugly bulging, too. Unless he was going the HDR route. Yuck. But he did use a Nikon, which is almost as good as Pentax. Just sayin'.

Anyway, this goes to the last point: if you have an assignment or are just photographing for fun, take multiple images. Don't take one snap and call it quits. Sure, you would from that get some good shots with enough time, but in terms of setting yourself up for success, it's best to take multiple similar shots.

Monday, October 29, 2012

How to Mess up a Photo Stitch

Taking a good photo is hard. Taking 30 good photos with the aim of making a single good image is substantially more difficult.


The problem with this image is immediately evident. About 1/3rd of the way from the right, the sky becomes a different shade and the clouds blurrier. That's due to the Hilton on the left. The Hilton is a large, white block reflecting a TON of sunlight, which altered the sky's color for the individual jpgs that included that structure. The sky on the right third comes from at least one image where the sky is the predominant aspect, so it represents what the color should actually be.

Unfortunately, that major problem ruined an otherwise fine, but boring, photo. How could I have avoided it? I should have metered the sky and then used the auto exposure lock button for a row of images of just the sky; then photographed the Hilton in a separate group; then photographed the triangles by the convention center in a third group. That would have metered each of the image's components properly and results in an image that was properly metered from side to side.

So, today's photo stitching tip: imagine the final image and then scan the scene for metering issues. Use your camera's exposure lock feature to photograph each major component at the same setting. The software will figure out the placement, in all probability. If not, some minor fixes can be done. We'll see those tomorrow.

Sunday, October 28, 2012

San Diego's Harbor Club East and West

Tied as the eighth-tallest buildings in San Diego, the Harbor Club East and West are both 424 feet tall and 41 stories.


The first thing to understand about this image is that it is not a single image. You're probably familiar with the practice of photo stitching -- panorama creation. This process combines multiple images to create a seamless, single finished image. 

This image began life as 36 14.6-megapixel images. If the images did not overlap in anyway, that would be a 525-megapixel finished product. Now, the images do and must overlap. Lenses have color drop-off and vignetting on the edges, so there's a limited, central range where each image can contribute to the overall composition without causing strange lighting problems in a photo. So this image's original is actually 7,447 by 6,633 pixels -- 49.4 megapixels. Yes, your math is correct -- less than 10% (on average) of each image is used in the final composition.

Why, though, this amount of waste? The most in-focus part of an image is the center. As the image progresses to the edge of the image circle (and frame), the image quality begins to blur and darken. So using only the central portions of the photos means that only the best parts of the images are retained -- only the most-in-focus areas used.

You'll notice this image seems exceedingly sharp and detailed. Part of that is because only the sharpest part of each image is used and part of that is because this 49-megapixel image was downsampled to a 0.8-megapixel image for this post. The actual pixel-by-pixel clarity is not any greater than in a typical image.

The Internet contains myriad guides to photo stitching. Suffice to say, you will need a camera and a software capable of creating stitched images. There are purpose-made programs for this use if you don't have Photoshop.

For the other posts this week, we'll look at some of the pitfalls to this technique and why they occur.

A Year in Photos -- Week Forty-five

Last week I was in San Diego for a couple of days attending a conference. On my first day, I had two hours to get out and take photos. I managed 76 that I wasn't unhappy with -- pretty good for two hours. So this week we're going to take a look at five photos, some good shots and some not. The purpose of this week's blog will be to show you some of my mistakes and discuss how to avoid them. Here are the photos we'll pick apart:


Thursday, October 25, 2012

First Infrared Film Experiements and a Bluefire Police Bonus

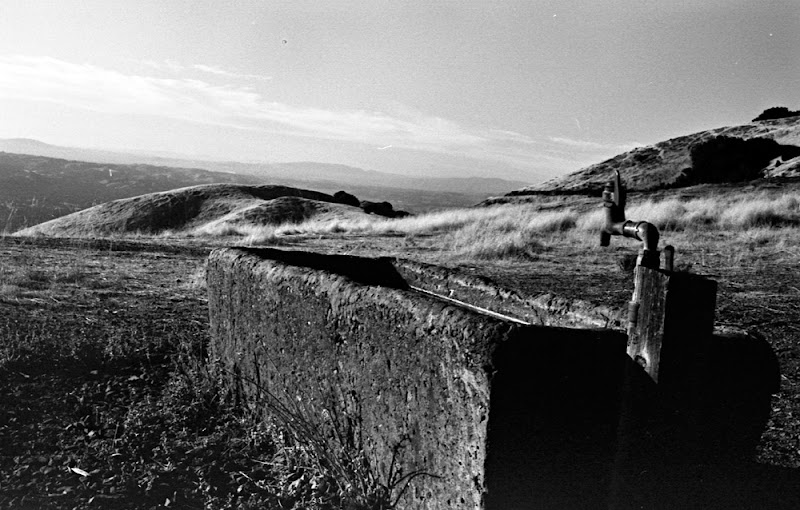
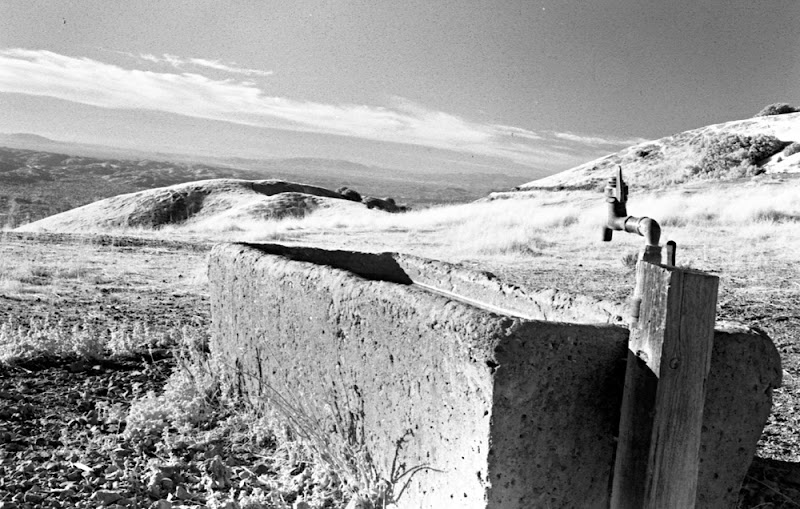
I've had two rolls of infrared film sitting in my fridge for about six months, waiting for an opportunity to use them. So I used them camping. I shot four copies of the same image -- ISO 400 with no IR filter, and then ISOs 6, 10, and 12 with an IR 720nm filter. The final images in the series are a Photoshop-generated composite of each image.

400

6

10

12

Combined

I find the combined image to be the best. Not only because the horizon is level, but also because the shadows have suitable darkness mixed with suitable detail and the overall infrared look gives it a desolated field suitable for the somewhat beat-up concrete.

For this shot I wanted to try a deep-field shot. In the 1930s, using PLATE cameras and infrared-sensitized emulsions, the U.S. Military was taking pictures with fields of view up to 330 miles (from airplanes.) Even today with great cameras, fields of clear view are not much more than 70 miles or so from an airplane (that's partly an estimate, partly a guess based on my own experience photographing the planet from airplanes.)

So, for reference, there's a tall bump on the left horizon line. That's Mount Tamilpas in Marin County, 35.36 miles as the crow flies from Juniper Campground.

400

6

10

12

Stacked images

Again I like the stacked image the most. Photoshop does a nice job of selecting each image's best qualities and ignoring the worst.

For my camera, I used my Pentax K1000. The lens was my Sigma Macro 50mm. Film: Rollei IR 820. This is a fabulous film and I strongly recommend trying it for fun, artistic expression, and experimentation.

As an added bonus, some images I took with Bluefire Police: a 64 ISO microfilm with a great amount of detail and pretty intense contrast. My scanners does NOT like this film, though, so there's a bit of scanner noise in the images.


Wednesday, October 24, 2012

Overnight Camping Photos

Last week I camped Monday night on Mount Diablo in Walnut Creek, California. I stayed in the Juniper Campground, the highest on the mountain, and took a site I thought would have good views. Here are some of the remaining images (the others being the star trails from yesterday.)


Night must have been truly terrifying for primitive man. Heck, I had three raccoons in my campground off and on and that was terrifying enough. Sly little buggers, raccoons.


Sunset over Walnut Creek, California. Not an easy capture, but the result is pleasing.


Actually, this isn't from the campsite. This is from the visitors center at the summit, looking North to Concord and Clayton.


This is also from the summit, looking South, toward Danville.


Sunrise at the campsite, in the same place where I took the plane and star trails photo.


Sunset from the campsite.


Sunset from near the campsite. With views like this, how could anyone not love this campsite? This is a wonderful place to spend a few nights.

Tuesday, October 23, 2012

Creating Star Trails

Star trails are a fairly easy 'showy' photograph to create. You need three things: a camera with manual settings, a tripod, a place with visible stars. This technique, however, is also good for other composites. The basic premise is to take a lot of photos in rapid succession, stack them all, and then erase all of the parts that are the same on each layer. This leaves the unique elements from each image and allows a photographer to capture long exposures without some of the long-exposure issues such as calculating film ISO and exposure times.

Step 1: Find a location that you think will yield interesting results. Even for your first image, interesting results are worth shooting for. There's a chance you'll get a great shot and the good results will likely spur you on to try again and improve from your previous efforts.

Step 2: Set up your trip pod and frame the shot through your camera. If you are going to do this on a new moon and don't have good lighting for your subject (e.g., if you're in a remote location without bright enough lights to yield good visibility through your viewfinder), set it up during the day, note your direction and tripod settings, and then return at night and re-apply the settings.

Step 3: Take a test shot. For star with no other light, I find that 30 seconds slightly stopped down (say f4) is pretty good. But take a test shot and adjust your settings until a single image looks good. Then set up your camera to take a LOT of photos. Most high-end DSLRs have a built-in intervalometer. An intervalometer takes a series of photos at a set interval. My K-7 can take up to 99 images with a minimum of one second between each image. That means that every 51 minutes and 15 seconds, my K-7 takes 99 images. So, if you want nice, long trails that require about 300 images to take, it will take about three hours and three intervalometer resets.

If your camera does not have a built-in intervalometer, you will want to buy one. Most purchased intervalometers run in the $15 to $35 range. These will typically take up to 399 consecutive images. So, set up your intervalometer and get ready.

Note that on my first image attempt I put five seconds between images to help keep the sensor cool. This was a HUGE mistake. The trails all had noticeable gaps between them that I couldn't get rid of. The image was taken over six hours with 400 images or something. 400 images times about 45 stars per image means I would have had to manually fill in 18,000 gaps. Pass.

Step 4: Take a series of images.

Step 5: If you have an EXTENDED version of one of the recent Adobe Photoshop versions (I have CS 4, so at lease CS 4 and later), you can automatically make star trails in Photoshop. Note that every time I've tried this in Photoshop without using a custom extension, I've had AWFUL results. So I use the Star Trails Stacker by Floris script for Photoshop. There are a number of free programs JUST for star trails photos, too. So you can do this without investing $700 in Photoshop.

Step 6: Blend the images. God help you if you elect to do this by hand. Assuming you use software, mess around with the settings and see what results you find the most visually appealing.

There you go -- a star trails image.In essence, it's just a lot of shots stacked and blended. Unless you have a film camera, then things get interesting.


This image was taken with 260 five- or six-second captures. This was more an experiment to capture airplanes landing at SFO. The stars were an added bonus.


This was an intentional star trail but with an accidental gap in the middle. The image itself isn't very good, though.

Monday, October 22, 2012

Macro Photography: How-to Videos

I've been making a number of YouTube videos on how to do different photographic things. Here are two on macro photography. The first introduces the macro bellows and shows basic use. The second introduces the set up I use for macro photography and shares some results (which you may have seen before.)


Sunday, October 21, 2012

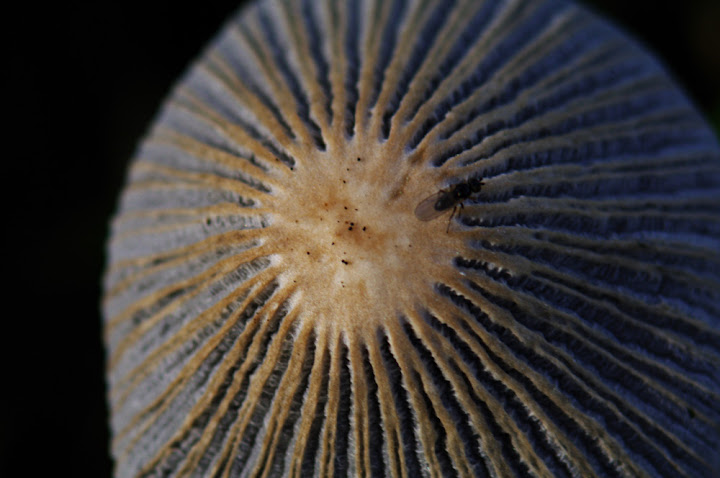
Parasola plicatilis -- Pleated Inky Cap Mushroom Macros

I took out the K-7, macro bellows, and Vivitar 135mm combo that I used a month or six weeks ago to capture some mantid macros. Tomorrow, I'll embed a couple videos that show you that set up. Nifty, eh? In the interim, here are some Parasola plicatilis -- pleated inky cap (or inkcap, or little Japanese umbrella) mushroom macros I captures in the apartment complex's newly sodded area.


These highly ephemeral little mushrooms last less than a day, including growth, sporing, and total decay. Here, by 10:00 AM, most of the overnight crop has vanished into the grass again. Dirt to dirt. These little mushrooms exemplify why 'being there' is the most important part of photography. Had I slept in past 7:00, I wouldn't have seen these. As you can see, by 8:00, or so, when I took these shots, one of the mushrooms had already gone flat ad begun dying.

A Year in Photos -- Week Forty-four

I have some exciting shots to share this week. Here's a preview:

Inky cap mushrooms. We'll also talk about macros this week. Yay for macros!


Star and plane trails at SFO. This is a multi-image composite made from about 260 photos. This post will be about how to set up your camera for this shot, how to take the images, and how to process them into a final product.


Campfires 2012. My little propane lamp next to my tent and in the background the more sophisticated modern-day campfires made of electric lamps and highways.

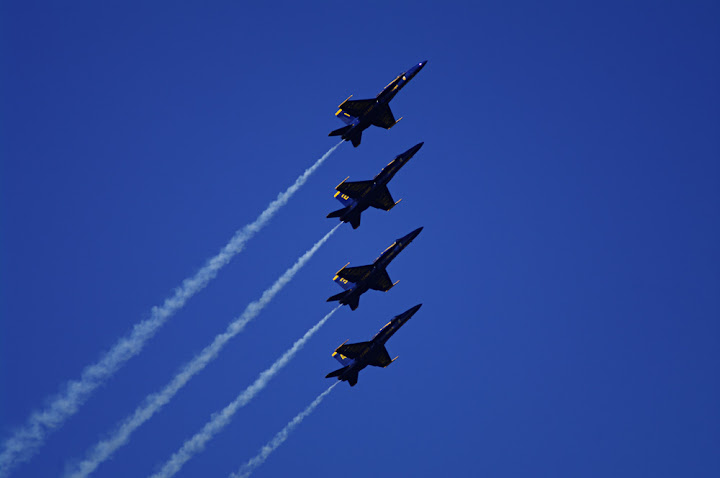
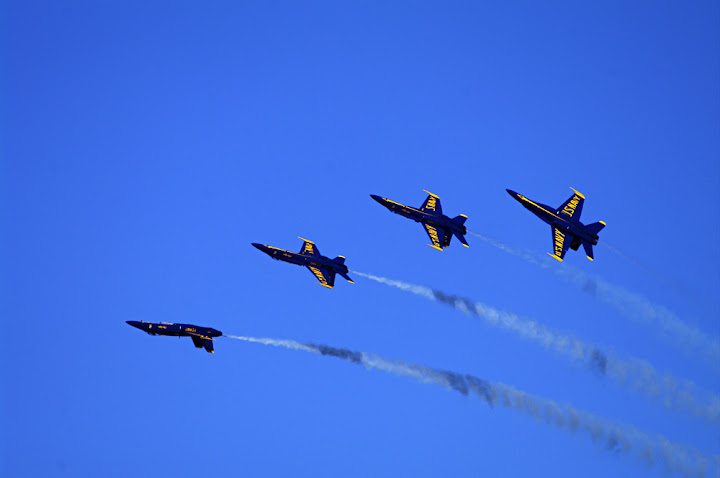
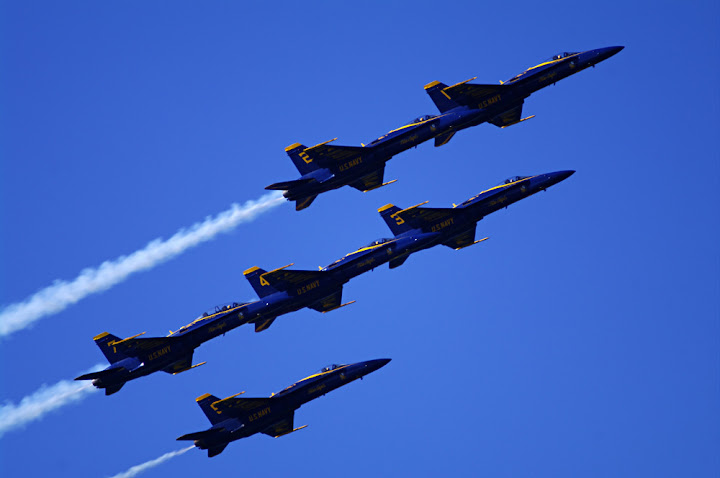
Blue Angels at Fleet Week 2012

You may have found yourself wondering 'what about the Blue Angels' all last week. Well, they performed last, so I saved their post for last, too. This may actually set a new record for most photos included in one post. The Blue Angels shots had the highest percentage of good shots to taken shots of each of the performers. I think you'll enjoy these results.


This guy right here is what everyone bought box seats for. Oh yeah. Seagull.